MemVerge Memory Viewer Installation Guide
- MemVerge Memory Viewer Installation Guide
- About the Installation Guide
- 1.0) System Requirements
- 2.0) Install Memory Viewer
- 3.0) Check the Memory Viewer Service Status
- 4.0) Customize the CXL System Topology UI
- 5.0) Using a Custom Company Logo
- 6.0) Uninstall Memory Viewer
- 7.0) Changelog
- 8.0) Open Source Software
- 9.0) Troubleshooting
- 10.0) Known Issues
- The CXL link in the System Topology view doesn't show the link speed/width.
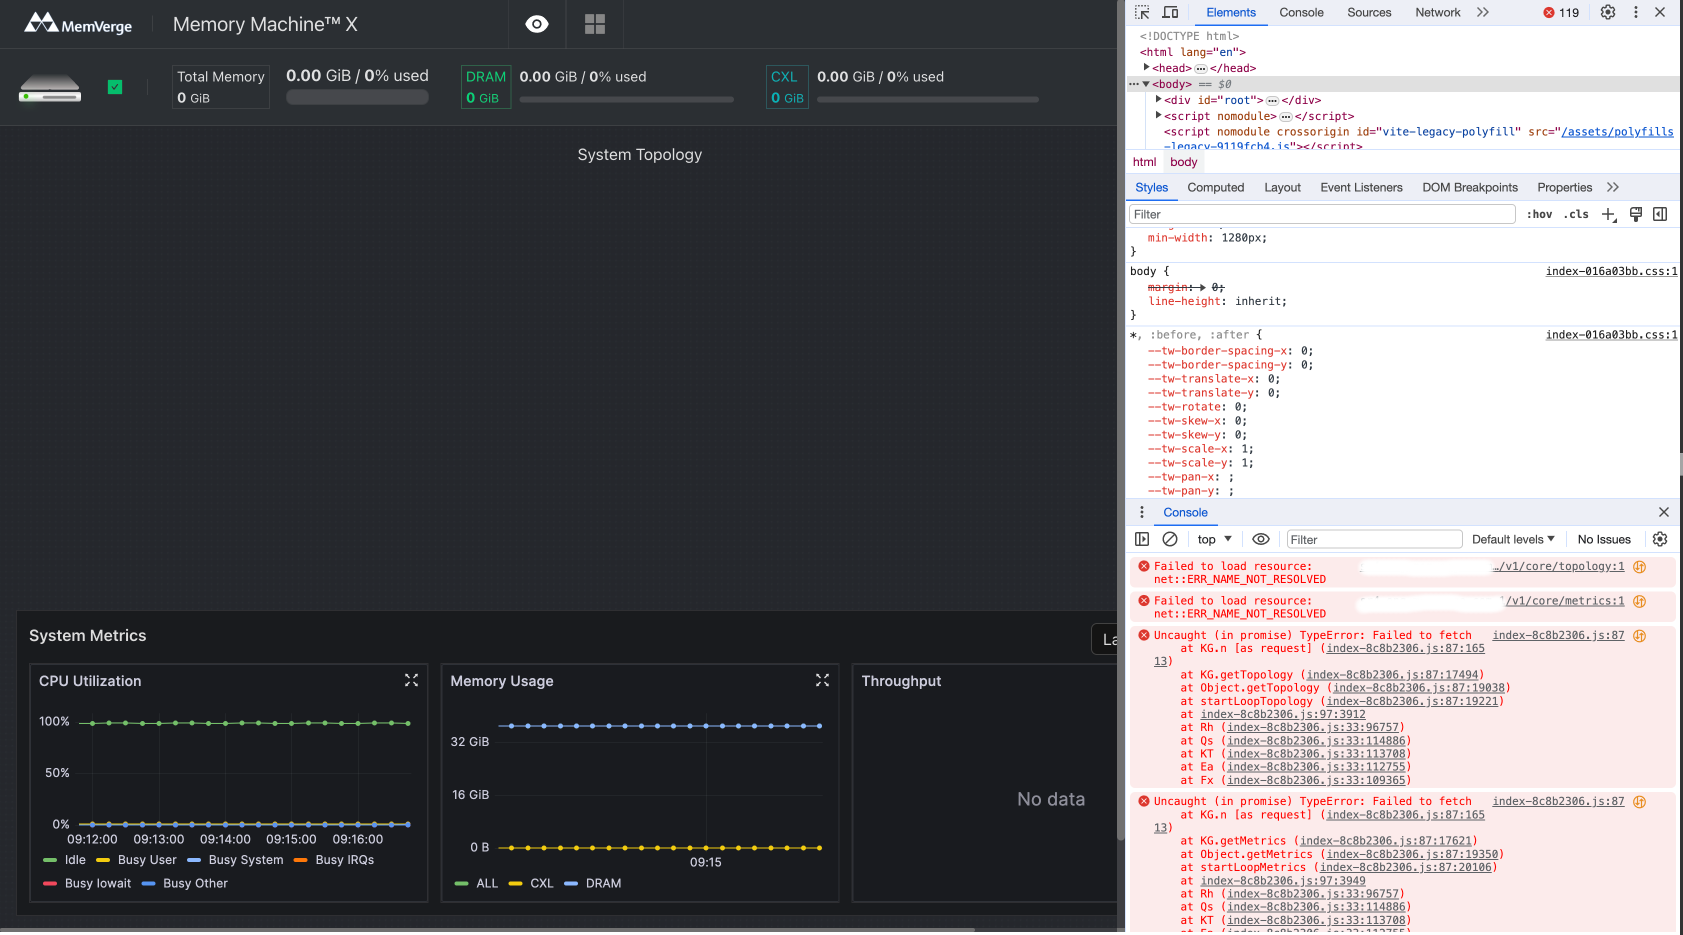
- The System Topology view may be blank when the hostname cannot be resolved.
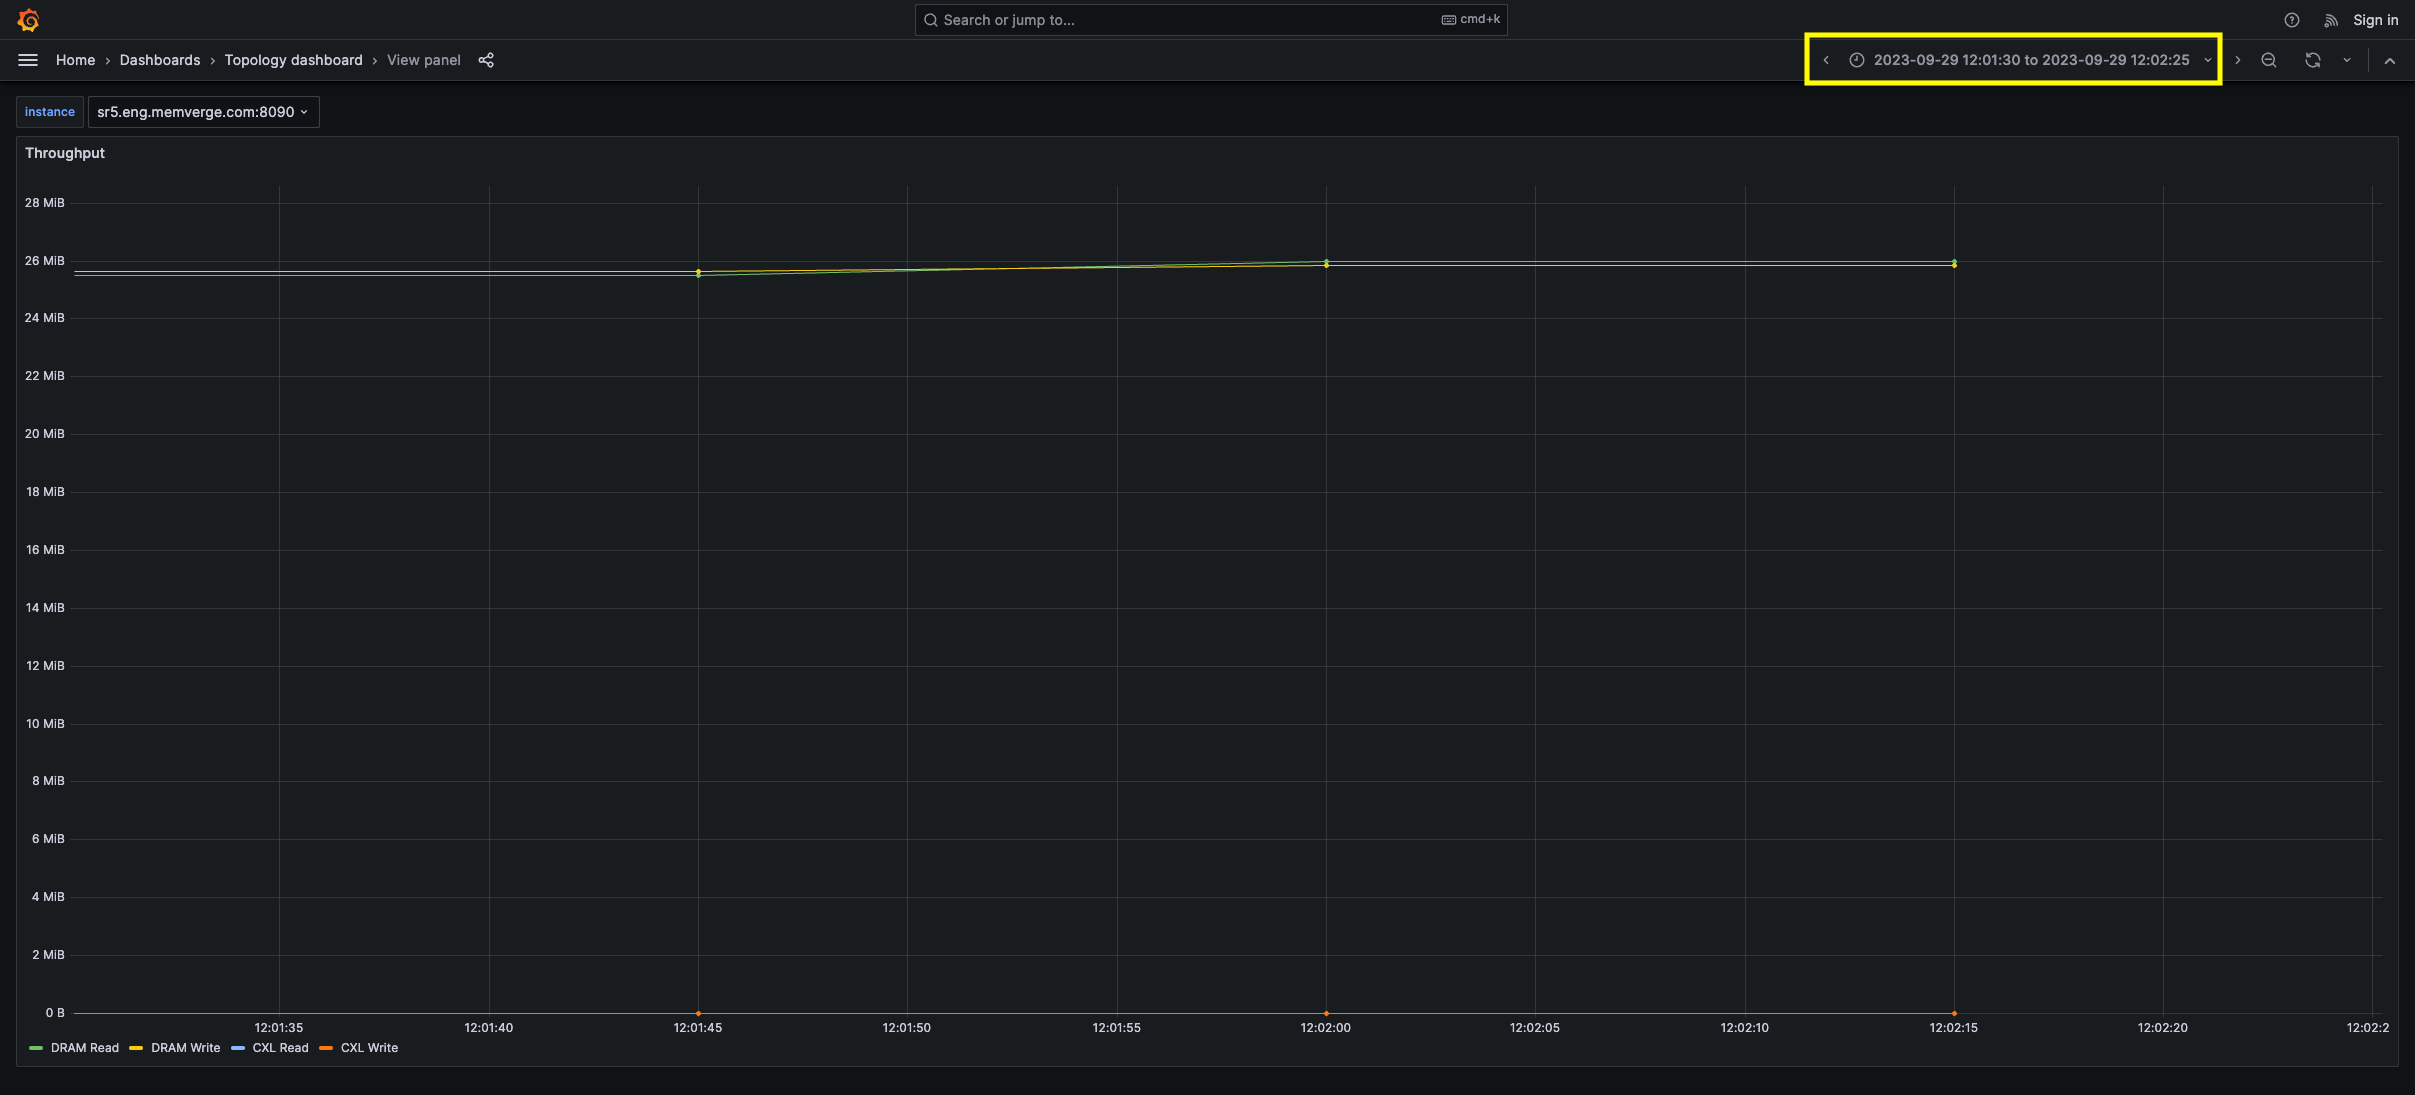
- Zooming into a Chart may not show any new updates
- The custom company logo is difficult to see
- After a system reboot or power cycle, the System Topology no longer shows any CXL devices.
- DRAM and CXL Used reports higher than application memory used
- The Memory Throughput charts show inflated values for DRAM on Intel and AMD platforms
- The Application Hot Memory Chart has gaps
- Appendixes
About the Installation Guide
This installation guide is for system administrators installing the Memverge Memory Viewer software. MemVerge recommends that you follow the instructions in the order they are written to ensure a successful installation.
1.0) System Requirements
Before you begin installing Memory Viewer, you should be aware of the following installation considerations:
- The system must have access to the Internet to download additional packages.
- The system administrator performing this installation must have the following permissions:
- SSH access to the target host
- Root user permissions are required to complete the installation
- A supported Linux Distribution
- Ubuntu Linux Server 22.04.01 LTS or newer
Required Network Ports for Installation
The Memory Viewer software requires access to the following ports to complete its installation process.
| Component | Port Number/Protocol |
|---|---|
| User Interface (mmlet) | 8080/tcp |
| REST API (mmmgr) | 8081/tcp |
| REST API (docs) | 8090/tcp |
| Prometheus | 8091/tcp |
| Grafana | 8092/tcp |
Use the following commands to add the required ports to the local firewall rules. These commands are suggestions only as they allow any host from any network to access the services, so you should consider refining them to be least privileged. Additionally, you may need to Port 8080 to your network hardware firewall/router.
Ubuntu:
$ sudo ufw allow 8080/tcp
$ sudo ufw allow 8081/tcp
$ sudo ufw allow 8090/tcp
$ sudo ufw allow 8091/tcp
$ sudo ufw allow 8092/tcp
Fedora:
$ sudo firewall-cmd --add-port=8080/tcp --permanent
$ sudo firewall-cmd --add-port=8081/tcp --permanent
$ sudo firewall-cmd --add-port=8090/tcp --permanent
$ sudo firewall-cmd --add-port=8091/tcp --permanent
$ sudo firewall-cmd --add-port=8092/tcp --permanent
$ sudo firewall-cmd --reload
2.0) Install Memory Viewer
2.1) Download Memory Viewer
Download the Memory Viewer package from the MemVerge download site:
If the host has an Internet connection, use curl or wget to download the file directly on the target server.
For example:
$ wget https://memory-viewer-bucket.s3.amazonaws.com/releases/v1.3.0/Memory_Viewer_v1.3.0-20231007032931.bin
If the host does not have Internet access, download it and the dependency packages to a host that does, then transfer the packages to the target server.
2.2) Remove a Previous Memory Viewer Installation
Versions of Memory Viewer prior to 1.3.0 are incompatible and must be uninstalled before installing Memory Viewer 1.3.0.
RHEL/CentOS/Fedora:
Ubuntu
2.3) Install or Upgrade Memory Viewer
Install or Upgrade Memory Viewer using the self-extracting BIN package file.
The usage information shows options to specify non-default values:
$ ./Memory_Viewer_v1.0.0-latest-20231003205729.bin --help
Verifying archive integrity...  100%   MD5 checksums are OK. All good.
Uncompressing Memory Viewer  100%
./Memory_Viewer_v1.0.0-latest-20231003205729.bin

Options:
    --install-path                Optional. Default is /opt/memverge. Specify CXL Memory Viewer install path
    --install=[SERVICE]           Optional.
                                  SERVICE='all', default, install both mmmgr and mmlet services
                                  SERVICE='management-host', install only mmmgr service on management-host
                                  SERVICE='compute-host', install only mmlet service on compute-host
    --mmmgr-port=[PORT]           Optional. Default port is 8080
    --mmlet-port=[PORT]           Optional. Default port is 8090
    --prometheus-port=[PORT]      Optional. Default port is 8091
    --grafana-port=[PORT]         Optional. Default port is 8092
    --help                        Print this help message
Installation Example:
$ sudo ./Memory_Viewer_v1.0.0-latest-20231003205729.bin
Verifying archive integrity...  100%   MD5 checksums are OK. All good.
Uncompressing Memory Viewer  100%
./Memory_Viewer_v1.0.0-latest-20231003205729.bin
Start to install MemVerge CXL Memory Viewer...
Ready to install into "/opt/memverge"
Installing compute host components...
--> Installing mmlet service...
temp_file.tar.gz                       100%[===========================================================================>]   3.57M  --.-KB/s    in 0.05s
--> Installing mmtier services...
Verifying archive integrity...  100%   MD5 checksums are OK. All good.
Uncompressing Memverge Tiering Component Services  100%
Created symlink /etc/systemd/system/mmtier.service.wants/mmtier_dm.service → /etc/systemd/system/mmtier_dm.service.
Created symlink /etc/systemd/system/mmtier.service.wants/mmtier_de.service → /etc/systemd/system/mmtier_de.service.
Created symlink /etc/systemd/system/mmtier.service.wants/mmtier_mp.service → /etc/systemd/system/mmtier_mp.service.
Created symlink /etc/systemd/system/multi-user.target.wants/mmtier.service → /etc/systemd/system/mmtier.service.
Starting mmlet service
Created symlink /etc/systemd/system/multi-user.target.wants/mmlet.service → /etc/systemd/system/mmlet.service.
mmlet is running
Installing management host components...
--> Installing mmmgr service...
temp_file.tar.gz                       100%[===========================================================================>]  90.48M  56.2MB/s    in 1.6s
temp_file.tar.gz                       100%[===========================================================================>]  79.30M  92.2MB/s    in 0.9s
temp_file.tar.gz                           [      <=>                                                                   ]   9.63M  8.54MB/s    in 1.1s
Starting mmmgr service
Created symlink /etc/systemd/system/multi-user.target.wants/mmmgr.service → /etc/systemd/system/mmmgr.service.
mmmgr is running
Adding Compute Host to Management Host list ...
Install completed.
Successfully installed MemVerge CXL Memory Viewer to "/opt/memverge", see "/var/log/memverge/package_install.log" for details.
3.0) Check the Memory Viewer Service Status
Memory Viewer runs a web server on port 8080. The mmlet.service and mmmgr.service are enabled and started by the installer and should automatically start at boot time. To verify the systemd service status, run:
For example:
$ sudo systemctl status mmlet mmmgr
● mmlet.service - MemVerge CXL Compute Host Service
     Loaded: loaded (/etc/systemd/system/mmlet.service; enabled; vendor preset: enabled)
     Active: active (running) since Tue 2023-10-03 21:56:44 UTC; 17min ago
   Main PID: 5839 (bash)
      Tasks: 195 (limit: 629145)
     Memory: 81.8M
        CPU: 2min 21.267s
     CGroup: /system.slice/mmlet.service
             ├─5839 /usr/bin/bash /usr/lib/memverge/mmlet_daemon_start.sh
             └─5848 /opt/memverge/sbin/mmlet --config=/etc/memverge/mmlet.yml

Oct 03 22:13:45 genoa3 bash[5848]: 2023/10/03 22:13:45 "OPTIONS http://genoa3.eng.memverge.com:8090/v1/core/topology HTTP/1.1" from 10.0.1.254:64569 - 204>
...

● mmmgr.service - MemVerge CXL Management Host Service
     Loaded: loaded (/etc/systemd/system/mmmgr.service; enabled; vendor preset: enabled)
     Active: active (running) since Tue 2023-10-03 21:56:55 UTC; 17min ago
   Main PID: 6131 (bash)
      Tasks: 242 (limit: 629145)
     Memory: 188.0M
        CPU: 51.826s
     CGroup: /system.slice/mmmgr.service
             ├─6131 /usr/bin/bash /usr/lib/memverge/mmmgr_daemon_start.sh
             ├─6140 /opt/memverge/sbin/mmmgr --config=/etc/memverge/mmmgr.yml
             ├─6146 /opt/memverge/sbin/prometheus/prometheus --config.file /var/lib/memverge/prometheus/conf.yml --storage.tsdb.path /var/lib/memverge/pro>
             └─6147 /opt/memverge/sbin/grafana/bin/grafana server --config /var/lib/memverge/grafana/conf/main.ini --homepath /opt/memverge/sbin/grafana

Oct 03 21:56:55 genoa3 bash[6140]: 2023/10/03 21:56:55 Starting server on :8080
Oct 03 21:56:58 genoa3 bash[6140]: 2023/10/03 21:56:58 "POST http://localhost:8080/v1/hosts HTTP/1.1" from 127.0.0.1:39500 - 201 57B in 5.434796ms
...
Using your web browser, navigate to the hostname or IP address of the target server using port 8080. For example: http://<hostname>:8080.
4.0) Customize the CXL System Topology UI
When Memory Viewer cannot automatically determine the server's topology, /etc/memverge/cxl_user_defined.json can be used to correct the server topology information. This step is optional and should be used only if the UI is incorrectly representing the hardware topology.
When changes to the UI System Topology are required, copy the skeleton file /etc/memverge/cxl_user_defined.json.mv to /etc/memverge/cxl_user_defined.json and edit it.
$ sudo mv /etc/memverge/cxl_user_defined.json.mv /etc/memverge/cxl_user_defined.json

$ sudo vim /etc/memverge/cxl_user_defined.json
The skeleton file has the following contents showing two CXL devices:
$ sudo cat cxl_user_defined.json
[
  {
      "PCIBusID": "0000:df:00.0",
      "PCIVendor": "MemVerge",
      "BackingMemory": "DDR4",
      "online":true,
      "PCILinkWidth": 16,
      "name": "mem0"
    },
    {
      "PCIBusID": "0000:108:00.0",
      "PCIVendor": "Samsung",
      "UserDefinedField1": "UserDefinedVal1",
      "UserDefinedFiled2": "UserDefinedVal2",
      "PCIVendor": "Samsumg",
      "online":true
    }
]
Values in the cxl_user_defined.json can be used to override the defaults or add additional CXL device information to the UI. The following table shows the variables that can be used to override the default auto-detected values. With the exception of PCIBusID, all other variables are optional and are only required if the default value is incorrectly displayed in the UI. PCIBusID is used to identify which CXL device to apply the changes.
| Variable | Overrides the Default | Data Type | Value Example | Description |
|---|---|---|---|---|
| online | Yes | Boolean | true | Specifies if the CXL device is ONLINE (true) or OFFLINE (false) |
| PCIBusID | Yes | String | "0000:df:00.0" | [Required] Provides the Bus,Device,Function information |
| PCIVendor | Yes | String | "CXLMemCo" | Specifies the CXL Device Vendor |
| NUMANodeID | Yes | Integer | 2 | Specifies the NUMA Node ID if the device is in 'system-ram' mode |
| name | Yes | String | "mem0" | Specifies the Kernel device name, eg: "mem0" |
| mode | Yes | String | "system-ram" | Speficies the CXL Namespace Mode, eg: "devdax" or "system-ram" |
| size | Yes | Integer | 137438953472 | Specifies the CXL Device Capacity in Bytes, eg: 137438953472 = 128 GiB |
| PCILinkWidth | Yes | Integer | 8 | Specifies the number of PCIe Lanes used, eg: x4, x8, x16 |
| CPUPackageID | Yes | Integer | 0 | Specifies which CPU Socket the CXL device is attached. |
Additional user-defined keys and values can be added. These fields will be shown in the hover over window for that device in the UI. The Key and Value are displayed as-is.
If the changes are not displayed in the browser UI, restart the mmmgr service using:
If the changes still do not appear, see the 'Troubleshooting' section for more information.
5.0) Using a Custom Company Logo
MemVerge Memory Viewer allows company logos to be included in the interface. Replace the logo-custom.png file in the /opt/memverge/sbin/frontend/ directory with your company logo, keeping the same file name. The image height should be 30px. The width is less important.
[/opt/memverge/sbin/frontend/] $ ls -1
assets
dashboards
index.html
logo-custom.png   <<<< Replace this file wit your company logo
logo-mv.png
mockServiceWorker.js
rapidoc-min.js
Your company logo will be shown on the header. A custom company logo will replace the default MemVerge logo in the header.

6.0) Uninstall Memory Viewer
Run the /opt/memverge/uninstall.sh script to completely remove Memory Viewer from your system.
Example:
$ sudo ./uninstall.sh
Uninstalling compute host...
--> Uninstalling mmtier services...
Removed /etc/systemd/system/mmtier.service.wants/mmtier_dm.service.
Removed /etc/systemd/system/mmtier.service.wants/mmtier_de.service.
Removed /etc/systemd/system/mmtier.service.wants/mmtier_mp.service.
Removed /etc/systemd/system/multi-user.target.wants/mmtier.service.
mmtier-buffers: using settings from /etc/memverge/mmtier_cfg.json
mmtier-buffers: data mover shm_name 'data_mover_buffer', size 1048576 B
mmtier-buffers: samples shm_name 'mmtier_samples', size 131072 B
mmtier-buffers: hidden pages shm_name 'mmtier_hidden_pages', size 131072 B
Removed /etc/systemd/system/multi-user.target.wants/mmlet.service.
Uninstalling management host...
Removed /etc/systemd/system/multi-user.target.wants/mmmgr.service.
Uninstall completed.
7.0) Changelog
10/05/2023
Memory Viewer v1.3.0 released:
What's Changed:
- Version 1.3.0 is a refactoring and re-architecture of the software to provide a foundation for future releases and features. No new functionality was added.
Bugs Fixed in this release:
- None
08/02/2023
Memory Viewer v1.2.2 released:
-
RHEL/CentOS/Fedora: mvmv-1.2.2-dragonfruit.x86_64.rpm
Container Image: https://hub.docker.com/r/memverge/mvmv
Bugs Fixed in this release:
- [MV-370] Separate pcmError from parsingError
- [MV-373] Support to override the hostname in the config file
- [MV-375] Use socket id 0 when numa node number socket is not found
- [MV-368] Support NDA AMDuProf 4.1
- [MV-372] Support to parse HDM 2 size
- [MV-371] Change "dmi decode" to "dmidecode" in error message
07/25/2023
Memory Viewer v1.2.1 released:
-
RHEL/CentOS/Fedora: mvmv-1.2.1-dragonfruit.x86_64.rpm
Bugs Fixed in this release:
- MV-364: Support SK hynix Niagara CXL memory appliance
- MV-365: CXL Device Capacity is reported as
0Bytes - MV-366: CXL devices in
system-ramnode should report the NUMAmeminfo -> MemoryUsednot 100% Used - MV-367: When Memory Machine is running, the CXL device capacity is counted twice
07/17/2023
Memory Viewer v1.2.0 released:
-
RHEL/CentOS/Fedora: mvmv-1.2.0-dragonfruit.x86_64.rpm
8.0) Open Source Software
MemVerge Memory Machine uses, redistributes, or installs the following open-source software:
- Grafana
- Prometheus
- TailwindCSS
- cxl v78
- daxctl v78
- ndctl v78
- lstopo v3.0.0a1-git
- numastat v20130723: Oct 5 2023
- node.js v16.20.0
- pnpm v8.3.1
9.0) Troubleshooting
Installation Issues
By default, Memory Viewer will install to /opt/memverge. If there are issues during the installation, see /var/log/memverge/package_install.log for details.
Modifications to 'cxl_user_defined.json' are not shown in the UI
After modifying the /etc/memverge/cxl_user_defined.json file, the changes are not seen in the UI. Check the /var/log/memverge/mmlet log file for errors. For example, the UI will ignore the cxl_user_defined.json if the contents are not valid JSON. The log file may contain errors similar to:
$ tail -1 /var/log/memverge/mmlet
2023/10/04 21:56:48 Failed to parse /etc/memverge/cxl_user_defined.json: invalid character '{' looking for beginning of object key string
Restarting the mmlet.service should re-read the file and display the changes:
One or more CXL Devices appear without a connection to a CPU
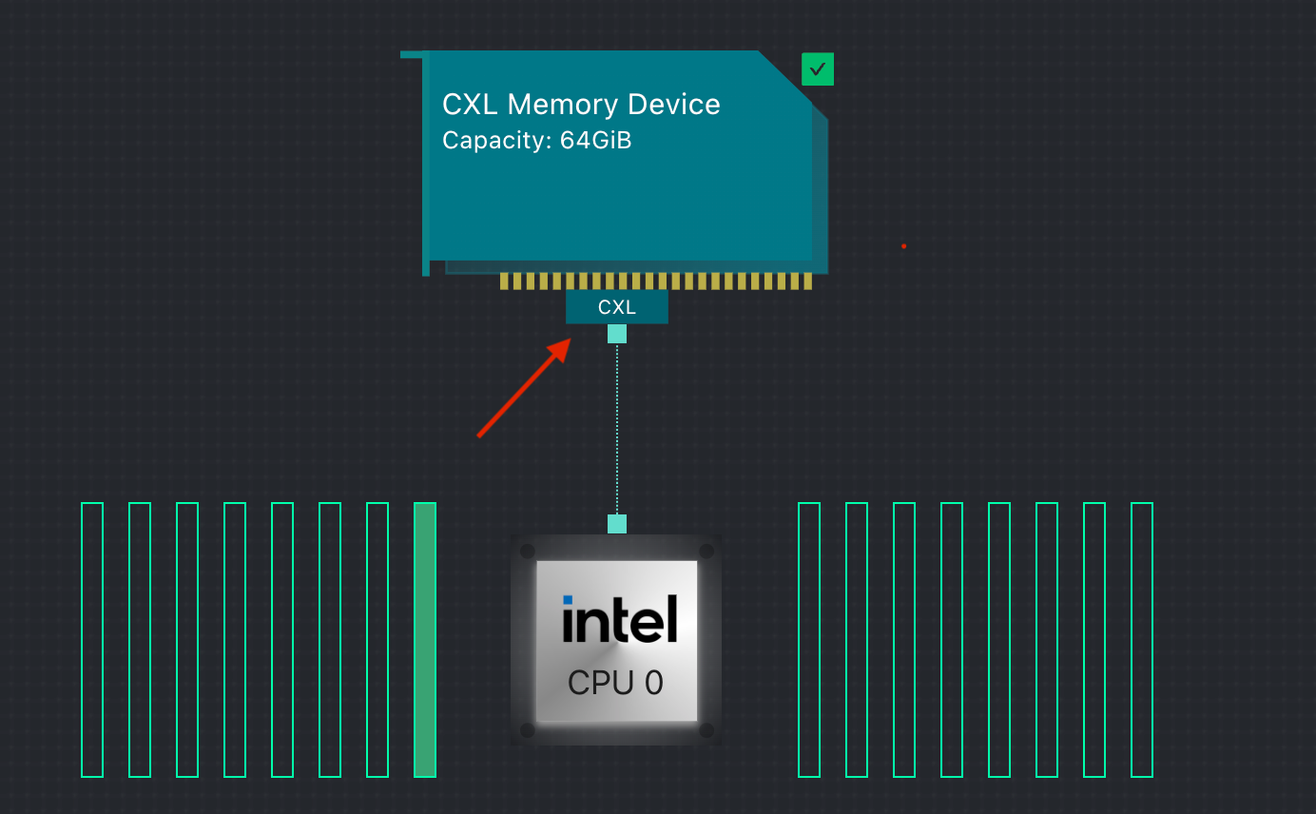
When Memory Viewer cannot automatically identify the correct CPU to which a CXL device is physically attached to, that device will appear in the UI within the "CXL Devices with Unidentified CPU IDs" section of the System Topology view. For example:

To resolve this issue, use the cxl_user_defined.json file described in Section 4.0 to set CPUPackageID to the correct CPU Socket ID. For example, the following will connect the CXL Device on Bus, Device, Function "108:00.0" to CPU Socket 0.
$ sudo vim /etc/memverge/cxl_user_defined.json
[
    {
      "PCIBusID": "0000:108:00.0",
      "CPUPackageID": 0
    }
]
10.0) Known Issues
The CXL link in the System Topology view doesn't show the link speed/width.
In the system topology view, the CPU and CXL Device link may show only 'CXL' rather than '[x4|x8|x16] CXL', for example.

Cause
The cxl_pci Linux Driver doesn't return the link speed/width information.
Workaround
Use the custom topology JSON file described in section 4.0 to specify the LinkSpeed in the user.
The System Topology view may be blank when the hostname cannot be resolved.
In situations where the UI does not show any system topology, open the Inspector and look at the Console in a Chrome or Edge web browser. You may see errors similar to "Failed to load resource

Cause
The issue is caused by a DNS failure to resolve the hostname to an IP address. This may happen when the host or connecting system (laptop/desktop) is not on a network.
Workaround
Use the IP address in the browser bar instead of the hostname. For example: http://<ip-address>:8080
Zooming into a Chart may not show any new updates
To zoom in, a user may select a time region in any of the charts. Doing so fixes the start and end date/time range so the chart won't auto-update. The date/time range is displayed in the upper right of the chart, as shown in the following screenshot.

Cause
The start and end date/time are fixed to the selected range when zooming in. The chart will not update in this mode.
Workaround
Select a new date range from the date/time drop-down such as "Last 5mins". Alternatively, close the tab, return to the main Memory View interface window, and select the chart again.
The custom company logo is difficult to see
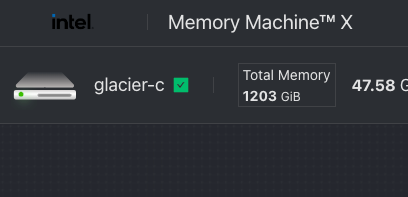
A dark custom company logo may be difficult to see on the default dark background that Memory Viewer uses. An example is shown in the following screenshot.

Cause
Dark colors do not work well with the dark background that Memory Viewer uses.
Workaround
Use a white or light version of the company logo for better contrast.
After a system reboot or power cycle, the System Topology no longer shows any CXL devices.
Cause
Type 3 CXL.mem devices are label-less, meaning there are no persistent media on which to write the labels in the Label Storage Area on the CXL device itself. A system reboot or power cycle returns the device to the system defaults.
Workaround
Write an init.d script or systemd.unit service to run the command(s) to configure the CXL devices to your required configuration. For example, to manually convert all CXL devices to 'system-ram' mode and have them appear as memory-only NUMA nodes in numactl -H, run:
DRAM and CXL Used reports higher than application memory used
Cause
The used values shows for DRAM and CXL include memory allocated by applications and buffers and caches used by the Kernel. All NUMA node values are summed using the Memory Total and Memory Used values in /sys/devices/system/node/node[0-9*]/meminfo. The memory summary values reported by Memory Viewer may be inflated due to the inclusion of buffers and caches within these calculations.
Workaround
None
Resolution
A future release of Memory Viewer will report memory usage and buffer cache usage separately to make this clearer.
The Memory Throughput charts show inflated values for DRAM on Intel and AMD platforms
Cause
The throughput charts for DRAM read and writes include CPU L1, L2, and L3 cache hits.
Workaround
None
Resolution
The CPU Cache hit throughputs will be displayed separately in a future product release.
The Application Hot Memory Chart has gaps
The Hot Memory chart for a profiled application may show gaps.
Workaround
None
Resolution
This issue will be fixed in a future product release.
Appendixes
Configuration File Locations
The configuration file locations for the components within Memory Viewer are described in the following table.
| Component | Configuration File |
|---|---|
| User Interface | /etc/memverge/mmlet.yml |
| REST API | /etc/memverge/mmmgr.yml |
| Prometheus | /var/lib/memverge/prometheus/conf.yml |
| Grafana | /var/lib/memverge/grafana/conf/main.ini |
Log File Locations
Log file locations for the components of Memory Viewer are described in the following table.
| Component | Log File |
|---|---|
| User Interface | /var/log/memverge/mmlet.log |
| REST API | /var/log/memverge/mmmgr.log |
| Prometheus | /var/log/memverge/prometheus.log |
| Grafana | /var/log/memverge/grafana.log |
| Installer | /var/log/memverge/package_install.log |
REST API Documentation
The REST API documentation can be found when navigating to http://
